Halloween Graveyard Cupcakes
Spooktacular Delight (Halloween Graveyard Cupcakes)
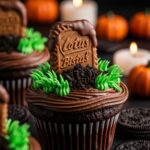
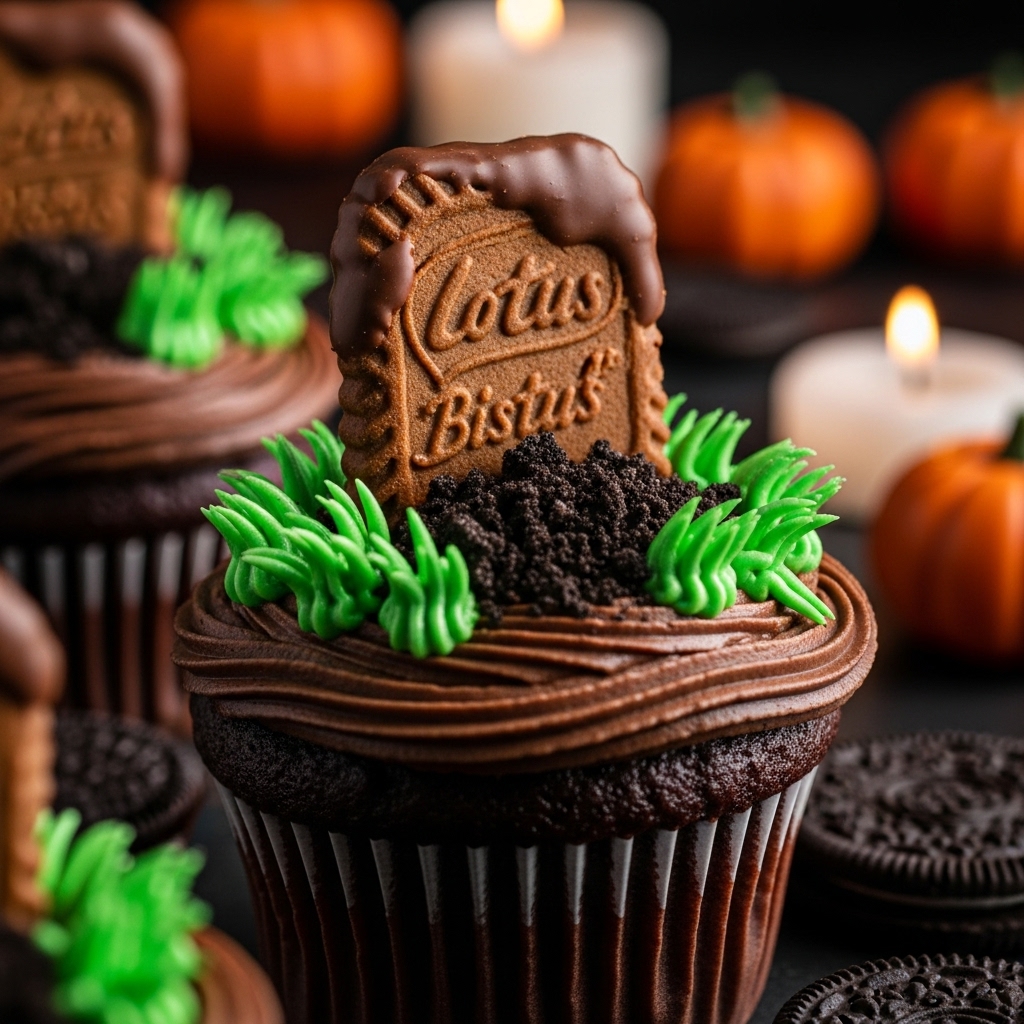
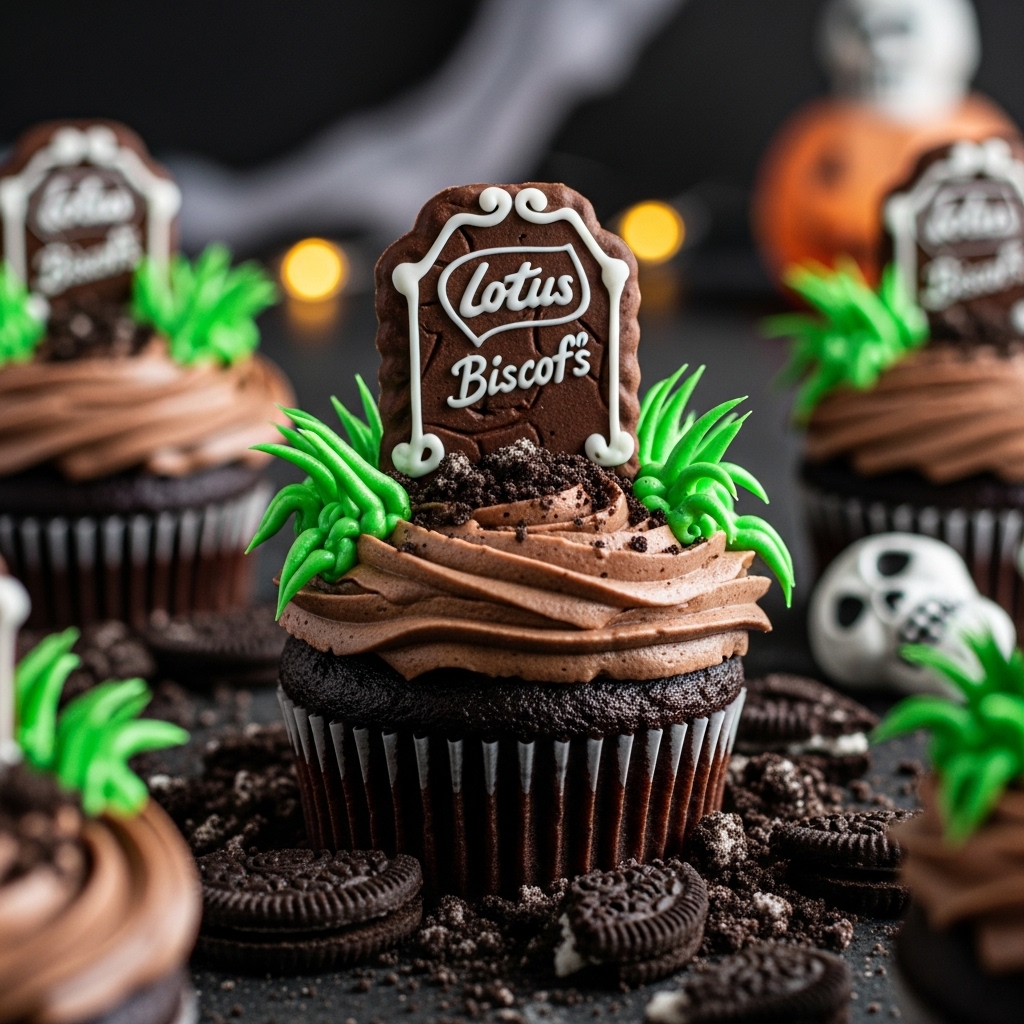
Get ready to conjure up some ghoulish fun in your kitchen with these Halloween Graveyard Cupcakes! Picture this: rich chocolate cupcakes, hauntingly filled with creamy Oreo cheesecake, topped with velvety chocolate buttercream, and decorated with Biscoff biscuit grave markers and crumbled Oreo “dirt.” These cupcakes are not just a treat; they’re a thrilling experience that combines indulgent flavors with whimsical Halloween spirit. Whether for a party or a spooky family night, these cupcakes will have everyone screaming with delight!
Why You’ll Love This Recipe
These Halloween Graveyard Cupcakes are a showstopper that will leave your guests in awe. Here’s why you’ll love them:
– Creepy-Cool Aesthetic: With their spooky decorations, these cupcakes are the perfect centerpiece for your Halloween spread.
– Decadent Flavors: The combination of chocolate, Oreos, and creamy cheesecake will send your taste buds on a delicious thrill ride.
– Fun to Make: Get the kids involved in the decorating process for a delightful family activity that’s as fun as it is delicious.
– Perfect for Any Occasion: Whether it’s Halloween or a themed party, these cupcakes bring joy and charm to every gathering.
Ingredients You’ll Need
Let’s dive into the ingredients that make these Halloween Graveyard Cupcakes a treat to remember! Each component brings its own unique flavor to the table. The combination of chocolate and Oreo is a match made in dessert heaven, while the Biscoff biscuits add that extra crunch and spice. Here’s what you’ll need to whip up your spooky delights:
– 12 Lotus biscoff biscuits
– 150 g dark chocolate (melted)
– 30 g white chocolate (melted)
– 175 g baking spread or unsalted butter (softened)
– 175 g caster sugar
– 3 large eggs
– 2 tbsp milk
– 150 g self-raising flour
– 25 g cocoa powder
– 1/4 tsp baking powder
– 115 g full-fat cream cheese
– 15 g icing sugar
– 15 g Oreos (crushed)
– 1/8 tsp vanilla extract
– 100 g butter (softened, unsalted)
– 165 g icing sugar
– 35 g cocoa powder
– 1-2 tsp milk
– 25 g butter (softened, unsalted)
– 50 g icing sugar
– 1/8 tsp vanilla extract
– Green food coloring
– 35 g Oreos (crushed)
Note: You’ll find the complete list of ingredients, along with their exact measurements, in the printable recipe card at the bottom of this post.
Variations
The beauty of these Halloween Graveyard Cupcakes is their versatility! Get creative and customize them to suit your tastes:
– Go Gluten-Free: Substitute the self-raising flour with a gluten-free blend to make these treats suitable for everyone.
– Add Extra Protein: Incorporate protein powder into your cupcake batter for a healthier twist.
– Make It Spicier: Add a pinch of cinnamon or nutmeg to the batter for a warm, spicy kick.
– Swap the Decorations: Use gummy worms or candy pumpkins for a different spooky effect!
– Cheese It Up: Try adding a layer of cream cheese frosting for an extra creamy bite.
How to Make Halloween Graveyard Cupcakes
Ready to get your bake on? Follow these simple steps to create your spooky masterpiece:
Step 1: Create the Biscuit Graves
Snap about a third off the end of each Lotus biscoff biscuit to create shorter grave markers. Melt the dark chocolate and dip each biscuit halfway into it. Place them on baking paper to set.
Step 2: Decorate the Graves
Once the dark chocolate has hardened, melt the white chocolate and transfer it to a piping bag. Pipe your favorite spooky designs onto the biscuits and let them set.
Step 3: Prepare the Cupcake Base
Preheat your oven to 140°C fan/160°C/325°F/Gas Mark 3. Line a cupcake tin with cupcake cases.
Step 4: Make the Sponge
In a mixing bowl, combine the baking spread and caster sugar. Using an electric whisk, mix for about 5 minutes until it’s light and fluffy.
Step 5: Add Eggs and Milk
Add the eggs and milk to the mixture, whisking until well combined.
Step 6: Fold in Dry Ingredients
Gently fold in the self-raising flour, cocoa powder, and baking powder until just combined.
Step 7: Bake the Cupcakes
Divide the batter amongst the 12 cupcake cases. Bake for 25-30 minutes, or until a skewer inserted in the center comes out clean. Let them cool completely.
Step 8: Make the Oreo Cheesecake Filling
Mix together the cream cheese, icing sugar, and vanilla extract until smooth. Stir in the crushed Oreos until evenly distributed.
Step 9: Core the Cupcakes
Using a cupcake corer or a knife, create a hole in the center of each cupcake.
Step 10: Fill with Cheesecake Mixture
Fill the holes with the Oreo cheesecake filling, either using a spoon or piping bag for precision.
Step 11: Prepare the Chocolate Buttercream
Mix together the butter, cocoa powder, and icing sugar, then add milk and mix until smooth. For best results, use a stand mixer with the paddle attachment.
Step 12: Make the Green Grass Buttercream
In a separate bowl, mix together the butter and icing sugar, then add vanilla and green food coloring until you achieve the desired shade.
Step 13: Decorate with Chocolate Buttercream
Pipe the chocolate buttercream onto each cupcake using a piping bag fitted with a round nozzle, smoothing the tops with a palette knife.
Step 14: Add the Grave Markers
Insert a chocolate-covered biscuit gravestone into each cupcake.
Step 15: Sprinkle Oreo Soil
Sprinkle the crushed Oreos in front of each biscuit grave for that eerie “dirt” effect.
Step 16: Pipe the Green Grass
Use a piping bag fitted with a multi-opening nozzle to add “grass” around the biscuit graves, or use a spoon to create texture.
Step 17: Serve and Enjoy!
Marvel at your spooky creations and enjoy the hauntingly delicious flavors!
Pro Tips for Making Halloween Graveyard Cupcakes
– Keep It Cool: Make sure your butter and cream cheese are at room temperature for the creamiest frosting.
– Don’t Overmix: When folding in your dry ingredients, be gentle to keep the cupcakes light and fluffy.
– Experiment with Fillings: Feel free to swap the Oreo filling for other flavors like peanut butter or fruit preserves for a fun twist.
– Chill the Frosting: If your buttercream is too soft, chill it for a few minutes before piping for better definition.
How to Serve Halloween Graveyard Cupcakes
Garnishes:
Enhance the vibe with little candy bats or spiders perched on top of the cupcakes!
Side Dishes:
These cupcakes pair wonderfully with hot apple cider or a scoop of vanilla ice cream for a creamy contrast.
Creative Ways to Present:
Serve them on a spooky platter surrounded by fake spider webs and plastic insects for a ghoulish display that will impress all your guests!
Make Ahead and Storage
Storing Leftovers:
Store any leftover cupcakes in an airtight container in a cool place for up to 3 days.
Freezing:
These cupcakes can be frozen without the toppings! Just wrap them tightly in plastic wrap and place them in an airtight container for up to 2 months.
Reheating:
Serve these cupcakes cold or at room temperature. If you’ve frozen them, simply let them thaw overnight in the fridge before serving.
FAQs
Can I use gluten-free flour?
Yes! Substitute self-raising flour with a gluten-free blend for a gluten-free version that’s equally delicious.
Is this recipe spicy?
No, these cupcakes have rich chocolate flavors without any added spice, making them perfect for all palates.
How do I make this recipe ahead of time?
You can make the cupcakes a day in advance and prepare the frosting and decorations closer to serving for optimal freshness.
Can I prepare these cupcakes in advance?
Absolutely! You can make the cupcakes and filling ahead of time; just frost them the day you plan to serve for best results.
Final Thoughts
Get ready to impress your friends and family with these Halloween Graveyard Cupcakes! The combination of delicious flavors, spooky decorations, and the fun of crafting them together makes this recipe a haunting highlight of any festive gathering. So, roll up your sleeves, grab your ingredients, and let’s create some spooky treats that are sure to delight! Happy baking! 🎃✨
Halloween Graveyard Cupcakes
Halloween Graveyard Cupcakes are a spooky and delicious treat that will impress your guests this Halloween. These chocolate cupcakes are filled with a creamy Oreo cheesecake, topped with rich chocolate buttercream, and decorated to resemble a graveyard scene with cookie gravestones and crushed Oreo soil. Perfect for Halloween parties or themed gatherings, these delightful cupcakes are sure to be a hit!
- Prep Time: 60 minutes
- Cook Time: 25 minutes
- Total Time: 1 hour 25 minutes
- Yield: 12 servings 1x
- Category: Dessert
- Method: Baking
- Cuisine: British
Ingredients
- 12 Lotus biscoff biscuits
- 150 g dark chocolate (melted)
- 175 g unsalted butter (softened)
- 175 g caster sugar
- 3 large eggs
- 150 g self-raising flour
- 25 g cocoa powder
- 115 g full-fat cream cheese
- 165 g icing sugar
- Green food coloring
Instructions
- Create the gravestones by breaking the biscoff biscuits and dipping them in melted dark chocolate. Set aside to harden.
- Preheat the oven to 140C Fan/160C/325F/Gas Mark 3 and line a cupcake tin with cases.
- Beat softened butter and caster sugar until fluffy. Add eggs and mix well. Fold in flour, cocoa powder, and baking powder.
- Divide the batter into cases and bake for 25-30 minutes until a skewer comes out clean. Cool completely.
- Mix cream cheese, icing sugar, and crushed Oreos for the filling. Core each cupcake and fill with the mixture.
- Prepare chocolate buttercream by combining butter, cocoa powder, icing sugar, and milk until smooth.
- Pipe chocolate buttercream onto cupcakes and insert the biscuit gravestones.
- Sprinkle crushed Oreos around the base of each grave and use green buttercream for grass decoration.
Nutrition
- Serving Size: 1 serving
- Calories: 524 kcal
- Sugar: 40 g
- Sodium: 251 mg
- Fat: 33 g
- Saturated Fat: 19 g
- Unsaturated Fat: 9 g
- Trans Fat: 0 g
- Carbohydrates: 56 g
- Fiber: 3 g
- Protein: 6 g
- Cholesterol: 106 mg

